|
Références
du kit - Kit reference
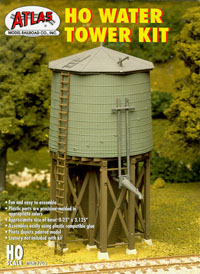
Atlas
# 703
Réalisation
- Completion :
Ce
kit est probablement le château d'eau le plus répandu
sur les chemins de fer miniatures nord-américains. Ceci
est certainement dû à son prix réduit.
Néanmoins,
malgré son prix très bas (environ 15.00 CDN$ ou
10.00 Euros accessoire inclus), il y a moyen de réaliser
un modèle extrèmement réaliste et convaincant.
Les
pièces s'assemblent sans difficulté particulière.
De temps à autre, un ajustement ou un ponçage est
requis.
L'assemblage
des deux morceaux de la cuve est un peu plus délicat si
l'on désire ne pas voir les jointures. Une astuce pour
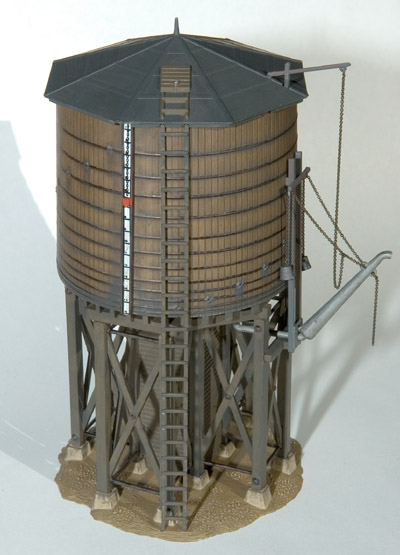
la jointure située juste à gauche de l'emplacement
de l'échelle : placer la jauge de niveau d'eau initialement
prévue un peu plus à droite de l'échelle.
Il faudra, toutefois, entailler la base du toit pour pouvoir laisser
passer le sommet de la jauge. Pour l'autre jointure, il n'y a
pas de miracle; il faut faire de son mieux pour ajuster les cerclages
et puis il faudra poncer sans trop abîmer les gravures des
planches de bois.
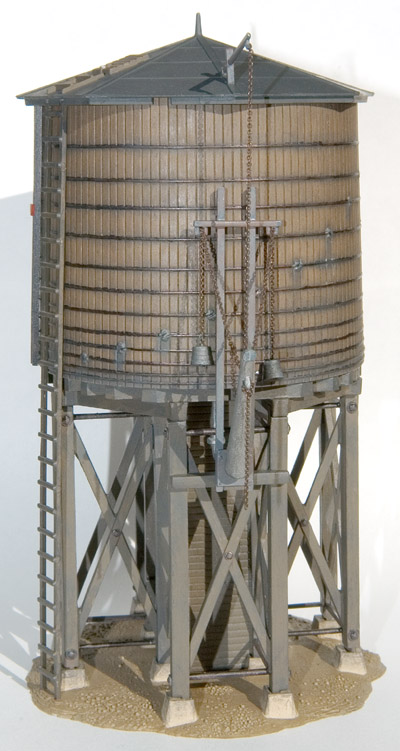
Le
support en bois de la cuve a été peint avec du Floquil
"Railroad Tie Brown" (# 110014) suivi par un wash et
un drybrush avec du PolyScale "Grimy Black" (# 414137).
Les barres métalliques et les boulons ont été
peints avec du Humbrol satin noir # 85 suivi par un drybrush avec
du Humbrol rouille # 113. Faire attention au fait que la peinture
PolyScale étant de l'acrylique, il faudra l'appliquer après
l'Humbrol.
La
cuve a été peinte d'abord avec du Humbrol "bois
naturel" # 110. Ensuite, un wash avec du mat # 33 a été
appliqué suivi par une couche de vernis mat # 49 suivant
une méthode maintenant éprouvée. Les attaches
de cerclages ont été peintes avec du "Gun Metal"
# 53 tandis que les cerclages eux-mêmes ont été
"coloriés" avec un feutre Staedler noir # 317-9
à pointe moyenne. Enfin, le tout a eu droit à un
savant drybrush au PolyScale "Grimy Black".
Le
toit a été peint avec du PolyScale GrimyBlack.
Les
accessoires métalliques ont été peints avec
du gris satin Humbrol # 123 suivi d'un léger drybrush à
la rouille # 113. Les poids sont en "Gun Metal" # 53
tandis que les conduites d'eau ont été réalisées
avec de l'aluminium # 56 suivi d'un drybrush au "Grimy Black".
L'échelle
ainsi que la trappe de visite sont peintes en Railroad Tie Brown
toujours suivi par un drybrush au "Grimy Black". La
jauge est réalisée en noir satin # 85 et l'indicateur
en rouge mat Humbrol # 60.
Le
sol est peint en brun Humbrol # 29 en attendant d'être intégré
à la texture du réseau tandis que les supports en
béton sont en Floquil "Foundation" # 110084 avec
un drybrush en "Grimy Black".
Enfin,
la chaîne est un accessoire Detail Associates # 2210 collée
avec de la CA.
Une
variante à ce montage est suggérée dans le
livre "Locomotive
Servicing Terminals" de Kalmbach Publications, mais elle
n'est pas très détaillée.
En
conclusion, il s'agit-là probablement du meilleur rapport
qualité-prix en matière de château d'eau pour
chemins de fer miniatures existant à ce jour. De plus,
ce kit offre beaucoup de plaisir à monter.
This
kit is probably the most widely
used water tower on North-American HO layouts. It is certainly
due to its low price.
But
it is possible to complete a very realist and convincing model
even if the kit is very cheap (about CDN$ 15.00 or Euros 10.00
including the accessory).
Parts
can be assembled without any particular difficulty. An adjustment
or sanding is nevertheless required from time to time.
Gluing
of both tank halfs is a little bit more tricky if invisible joints
are expected. A tip for the joint that is located just left of
the ladder location : glue the water level gauge, which was initially
intended to be located a little bit further to the right of the
ladder, on the joint. However, a hole in the roof base has to
be practised in order to accomodate the top of the gauge. There
is no miracle for the other joint : align bands to the best and
then sand but avoid damaging carving of wood planks.
Wooden
structure for the tank has been painted with Floquil Railroad
Tie Brown (# 110014) followed by both a wash and drybrushing with
PolyScale Grimy Black (# 414137). Metallic braces and bolts were
painted with Humbrol Black Satin # 85 followed by a drybrush with
Humbrol Rust # 113. Be aware that PolyScale paint is acrylic and
has to be applied after the Humbrol enamels.
Tank
has first been painted with Humbrol Natural Wood # 110. A Humbrol
Matt # 33 wash was then applied prior adding a coat of Humbrol
Matt Varnish # 49 according to a now well proven technique. Band
ties were painted with Humbrul Gun Metal # 53 while bands themselves
were "coloured" with a Medium Black Staedler pen (#
317-9). Then the whole assembly was cleverly drybrushed with PolyScale
Grimy Black.
Roof
was painted with PolyScale Grimy Black.
Metallic
accessories have been painted with Humbrol Satin Grey # 123 followed
by a light drybrush with rust # 113. Both weights were painted
with Humbrol Gun Metal # 53 when water pipe and spout are done
with Humbrol Aluminium # 56 followed by a Grimy Black drybrush.
Ladder
and access door were painted with Floquil Railroad Tie Brown still
followed by a Grimy Black drybrush. Water level gauge was done
with Humbrol Satin Black # 85 and marker with Humbrol Matt Red
# 60.
Ground
was painted with Humbrol Matt Brown # 29 while concrete footings
were done with Floquil Foundation # 110084 once again followed
by a Grimy Black drybrush.
At
last, the chain is a Detail Associates accessory # 2210 that was
glued with CA.
A
variation of the assembly is exposed in Kalmbach Publications'
Locomotive
Servicing Terminals
but is unfortunately not very detailed.
This
kit is probably the one that offers the best quality-price ratio
for a wooden water tower available today and also offers great
fun to complete.
Pierre
GILLARD, février/February 2006.
|
 Model Railroad